Julie Pecarski Consulting

  • About Julie
  • HR Support
  • Nutrition Coaching
  • Blog
    • Recipes
      • Desserts, Snacks, Protein Balls + Fat Bombs
      • Drinks + Beverages
      • Juices, Smoothies + Bowls
      • Breads + Muffins
      • Cocktails
      • Breakfast + Brunch
      • Dips, Nut Butters, Spreads + Sauces
      • Salads, Soups + Stews
      • Main Dishes
      • Side Dishes
      • Special Occassion
      • Natural Beauty + Cleaning
  • Terms
You are here: Home / Uncategorised / Grain Free Hasselback Apples

Grain Free Hasselback Apples

Uncategorised

30 Jun

I’ve been pretty committed about reducing my sugar intake including fruit. I know, we’re always told to eat our fruit because they ARE rich in vitamins, minerals, antioxidants, and fibre. However, if you have any blood sugar imbalances, watching your sugar intake is critical in balancing them out.

Most of the women that I work with, and in particular those that have stress in their lives, likely have some form of sugar imbalance going on. That stress hormone cortisol, when at it’s peak, has the ability to knock your blood sugar out of whack.

Now, I don’t totally eliminate all fruit from my diet. I eat avocados daily but because they are full of plant-based fats so they have the ability to stabilize our blood sugar. And, then, you’ll see me top my chia puddings with raspberries and blueberries but limited to 1/4-1/2 cup only.
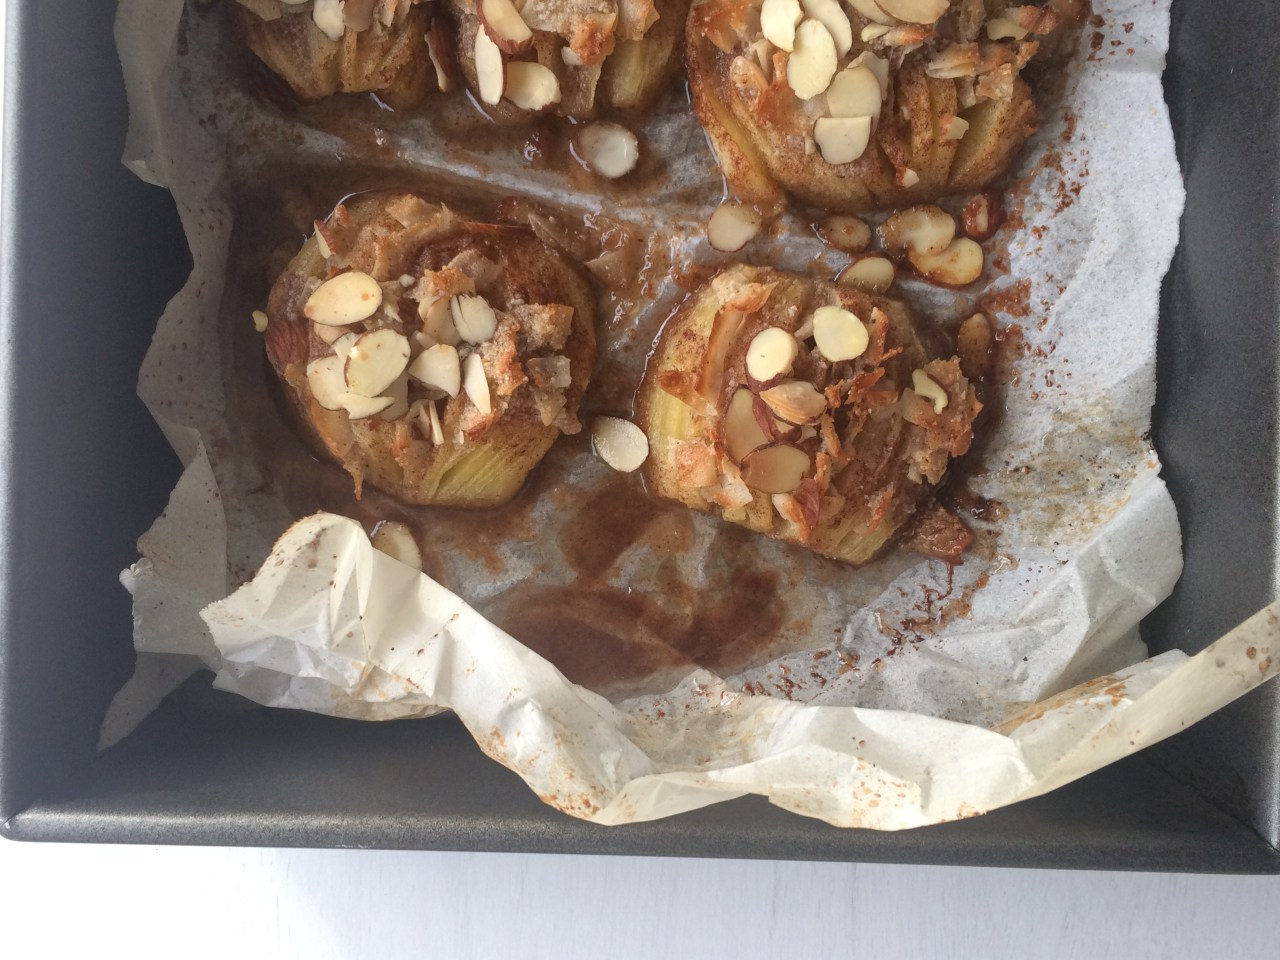
 

Apples are also a great alternative. They are full of fibre which will help to slow that blood sugar spike. It’s even better when you eat it with the skin on!

If you love baked apples or apple sauce, you are going to love this recipe! I actually made it for breakfast and it was divine. It would also be a great desert if you’re entertaining with a big ‘ol scoop of coconut whip or cream or even coconut ice cream. Yummmm!!!

GRAIN FREE HASSELBACK APPLES

Ingredients
2 large apples (I used Golden Delicious but Pink Lady and Ambrosia would also be great!)
2 tbsp coconut oil, melted
1 tbsp cinnamon
1 tbsp maple syrup or honey

Filling
3 tbsp unsweetened shredded coconut
¾ tsp cinnamon
1/2 tbsp maple syrup or honey
¼ tsp nutmeg
3 tbsp coconut oil
1½ tbsp almond flour
pinch of salt

Toppings
1 can coconut cream
1 tsp maple syrup or honey
¼ tsp cinnamon
¼ cup toasted nuts, chopped

Directions

  • Preheat the oven to 350 degrees.
  • Peel the apples, core and slice in half. Place the apples face down on a cutting board and cut ¾ of the way through the apple, continue making slices across the rest of the apple. If they break, no worries.
  • Combine the melted coconut oil, cinnamon and sweetener in a bowl. Place the sliced apples core side down in a baking dish and liberally brush with the coconut oil, sweetener and cinnamon mixture. Cover the baking dish with tinfoil and bake in the over for 25-30 minutes or until the apples become tender.Remove from the oven and allow the apples to slightly cool. (I lined mine with parchment for less mess)
  • In a bowl combine the ingredients for the filling. Add 1-2 spoonfuls of the apple juice from the bottom of the pan to thin out the mixture.
  • Using a fork, carefully place a small amount of the coconut mixture into each of the slits. Once the apples have been stuffed, return the baking dish to the oven and bake for 10 more minutes.
  • While the apples are cooking, stir the coconut cream, sweetener and cinnamon together.
  • To serve top each apple with a spoon full of the coconut whip and sprinkle with chopped pecans.
Share
Share
« Chocolate Banana Nut Butter Cups
4-Ingredient Peanut Butter Cookies »

Get Social

  • Email
  • Facebook
  • Instagram
  • Pinterest
  • Tumblr
  • YouTube

Recent Posts

  • Dairy Free Dark Chocolate Pudding
  • But first, coffee. How I make mine!
  • TOP 10 FOODS THAT I USE TO HELP ME BOOST METABOLISM
  • Low Carb vs. Keto – What’s The Difference?
  • Signs That Your Gut Is UnHealthy
  • Privacy Policy
  • Terms

balancebyjulie

Let’s not over complicate this sh*t shall we?!?! Let’s not over complicate this sh*t shall we?!?!

Save this for the days when your protein goal is looking a little… ambitious. 👀

#HighProteinLifestyle #ProteinTips #MidlifeNutrition #StrongOver40 #womenwholift
I was listening to a podcast recently talking abou I was listening to a podcast recently talking about why women in the 40’s and beyond need to stop thinking they need to be smaller. But rather thinking about something strength to carry them through the next phase of life.

Then, almost immediately, I overheard a woman talking about how frustrated she was because the scale wasn’t moving—if anything, it was going up.

And honestly? I get it.

I still catch myself getting wrapped up in the number sometimes.

But what I’ve learned is that when I follow a solid plan, fuel my body properly and consistently strength train, I get stronger. I sleep better. My energy is higher. And, truthfully, I really like the shape of my stronger body.

Maybe the goal isn’t to keep chasing a smaller version of ourselves.

Maybe it’s to build a body that can carry us through the next 40 years feeling strong, energized and confident.

And yes, we can still want to look our best. We just don’t have to make smaller the definition of better.

Who’s coming to this side with me?

#StrongOverSkinny #StrongOver40 #MidlifeGlowUp #WomenWhoLift #HealthyAging
Trying the viral HB high-protein pizza 🍕 Okay… I Trying the viral HB high-protein pizza 🍕

Okay… I get the hype. An easy way to add more protein while still enjoying pizza.

For the crust:
• ¼ cup cottage cheese
• ⅓ cup egg whites
• ⅓ cup flour
• 1½ tbsp coconut flour
• 1 tsp baking powder
• 1 tsp garlic powder
• 1 tsp oregano
• Pinch of salt

How to make it:

1. Mix all the crust ingredients together until combined.
2. Spread onto parchment paper into a thin, even crust.
3. Bake at 350°F for 10–12 minutes.
4. Remove and add your pizza sauce, cheese and favourite toppings.
5. Bake for another 10+ minutes, until the cheese is melted and the crust is cooked through.

🍕 Nutritionist verdict: Easy, high-protein and actually feels like pizza. No sad “diet food” vibes here.

Save this for your next pizza night!

#HighProteinRecipes #ProteinPizza #MidlifeNutrition #EasyHealthyRecipes #highproteinmeals
5 things I wish I knew when I started strength tra 5 things I wish I knew when I started strength training at 40:

1️⃣ Follow a plan. This is key to see results.
2️⃣ Progressive overload > randomly lifting heavy.
3️⃣ Eat after your workout — protein + carbs.
4️⃣ Recovery is part of the workout. I take 2-3 “active” rest days. 
5️⃣ Consistency. If you’re just starting out, start with 2 days & master that!

Your 40s are a pretty great time to start building the strongest version of you.

Want the training app I use? DM me “TRAIN” and I’ll send you a free week.

#WomenWhoLift #StrengthTrainingForWomen #StrongOver40 #MidlifeStrength #healthyaging
She didn’t need another complicated diet. She need She didn’t need another complicated diet. She needed a few simple tweaks that actually fit her busy life.

that’s the thing: it doesn’t have to be everything all at once!

two small changes—and ended up feeling better and losing lbs.

#MidlifeWellness #MidlifeNutrition #GutHealth #WomenOver40 #HealthyHabits
Follow on Instagram

Copyright © 2026 · juliepecarskinutrition.com. Customized by AlfredK